


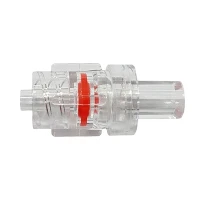


Hey there! As a supplier of Female Luer Lock Connectors, I've gotten a ton of questions about how to remove them. So, I thought I'd put together this blog to share some tips and tricks.
First off, let's talk a bit about what a Female Luer Lock Connector is. If you're not familiar, you can check out this link: Female Luer Lock Connector. These connectors are widely used in the medical and industrial fields, mainly for connecting different components like tubing, syringes, and other devices securely.
Now, onto the main topic: how to remove a female luer lock connector. There are a few different scenarios, and the way you remove it can vary depending on how it's connected in the first place.
1. Basic Rotational Removal
The most common type of female luer lock connector is designed to be connected to a Male Luer Lock Connector. You can learn more about male connectors here: Male Luer Lock Connector. When they're connected, they're typically screwed together, and the removal process is usually a matter of unscrewing.
Here's a step - by - step guide on the basic rotational removal:
- First, make sure you're in a stable position: You don't want to accidentally drop the device or cause any spillage if there's any fluid in the system. Hold the device firmly but gently.
- Identify the direction: Female luer lock connectors are usually removed by turning counter - clockwise. This is a standard practice across the industry, just like unscrewing a regular screw.
- Grip the connectors properly: You can use your thumb and forefinger to hold the base of both the female and the male connectors. Make sure your grip is firm enough so that the connectors don't slip during the removal process.
- Start turning: Apply a steady, gentle pressure as you turn the female connector counter - clockwise. If it's a tight connection, you might need to use a bit more force, but be careful not to overdo it as you could damage the connector.
2. Removing from a Rotating Luer Connector
Sometimes, female luer lock connectors are connected to Rotating Luer Connectors. You can find more info on these here: Rotating Luer Connectors. These are designed to allow for easy movement and rotation, which can make the removal a bit different.
- Understand the mechanism: Rotating luer connectors have a special design that allows for rotation while still maintaining a secure connection. Before you start removing the female connector, make sure you understand how the rotating part works.
- Stabilize the rotating part: Hold the rotating part firmly with one hand so that it doesn't move around while you're trying to unscrew the female connector. This will give you better control over the removal process.
- Unscrew as usual: Once the rotating part is stable, use your other hand to turn the female luer lock connector counter - clockwise. Just like in the basic rotational removal, apply a steady pressure.
3. Dealing with Stuck Connectors
Sometimes, connectors can get stuck. This could be due to various reasons like dirt, debris, or over - tightening.
- Clean the connectors: If there's dirt or debris around the connectors, it can cause them to stick. Use a clean, dry cloth to wipe away any visible dirt. You can also use a mild cleaning solution, but make sure it won't damage the connectors.
- Use a lubricant: In some cases, a little bit of lubricant can help. You can use a medical - grade lubricant if you're dealing with medical devices. Apply a small amount around the threads of the connectors, and then try to unscrew the female connector again.
- Apply heat (with caution): If the connectors are made of a plastic material that can withstand a bit of heat, you can try using a hair dryer on a low setting to warm them up slightly. The heat can cause the plastic to expand a bit, which might make it easier to unscrew the connector. But be very careful not to overheat the connectors as it could damage them.
4. Safety Precautions
When removing female luer lock connectors, it's important to take some safety precautions.
- Wear gloves: If you're working with medical devices or chemicals, wearing gloves can protect your hands from any potential contaminants.
- Avoid damage to the connectors: Make sure not to use too much force when removing the connectors. Damaged connectors can lead to leaks or other issues.
- Proper disposal: If the connectors are no longer in use, make sure to dispose of them properly according to the relevant waste management regulations.
5. Why Choose Our Female Luer Lock Connectors
As a supplier, I'm really proud of the Female Luer Lock Connectors we offer. They're made with high - quality materials, which ensures a long - lasting and reliable connection. The design is also user - friendly, making it easy to connect and remove them.
If you're in the market for female luer lock connectors, whether it's for a medical, industrial, or any other application, I'd love to talk to you. We can offer you competitive prices, great after - sales service, and a wide range of connector options. If you're interested in purchasing, feel free to reach out to us for a detailed consultation.
In conclusion, removing a female luer lock connector doesn't have to be a hassle. With the right techniques and a bit of patience, you can do it easily. And if you need high - quality connectors, don't hesitate to get in touch with us.


References
- General knowledge from years of experience in the Female Luer Lock Connector supply business.
- Industry standards and best practices for luer lock connector usage and removal.