


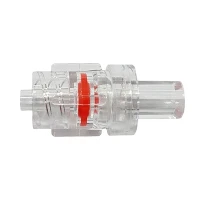


Replacing a damaged CT contrast tubing is a crucial procedure in medical settings, ensuring the safe and effective delivery of contrast agents during CT scans. As a leading supplier of CT Contrast Tubing, I understand the importance of this process and am here to guide you through the steps.
Understanding the Importance of CT Contrast Tubing
CT contrast tubing plays a vital role in enhancing the visibility of internal structures during CT scans. Contrast agents are injected through this tubing into the patient's bloodstream, highlighting specific organs or tissues and providing clearer images for accurate diagnosis. A damaged tubing can compromise the injection process, leading to inaccurate results or potential harm to the patient. Therefore, knowing how to replace it properly is essential for healthcare professionals.
Step-by-Step Guide to Replacing Damaged CT Contrast Tubing
Step 1: Gather the Necessary Supplies
Before starting the replacement process, ensure you have all the required supplies. You will need a new CT Contrast Tubing, a syringe filled with saline solution for flushing, alcohol wipes for disinfection, and gloves to maintain sterility.
Step 2: Prepare the Patient
Explain the procedure to the patient to alleviate any concerns and obtain their cooperation. Position the patient comfortably and expose the area where the tubing is connected.
Step 3: Stop the Contrast Injection
If the contrast injection is in progress, pause it immediately. This can usually be done by stopping the infusion pump or closing the clamp on the tubing.
Step 4: Disconnect the Damaged Tubing
Put on gloves to prevent contamination. Use an alcohol wipe to clean the connection points of the damaged tubing. Carefully disconnect the tubing from the patient's IV access and the contrast injector. Be cautious not to spill any remaining contrast agent.
Step 5: Inspect the New Tubing
Before connecting the new tubing, inspect it for any visible damage or defects. Check the expiration date and ensure that all the components are intact.
Step 6: Prime the New Tubing
Fill a syringe with saline solution and attach it to the new tubing. Slowly push the saline through the tubing to remove any air bubbles. This process, known as priming, is crucial to prevent air embolisms during the injection.


Step 7: Connect the New Tubing
Clean the connection points again with alcohol wipes. Connect one end of the primed tubing to the patient's IV access and the other end to the contrast injector. Make sure the connections are secure to prevent leakage.
Step 8: Resume the Contrast Injection
Once the new tubing is properly connected, restart the contrast injection. Monitor the patient closely for any signs of discomfort or adverse reactions.
Tips for a Successful Replacement
- Follow Manufacturer's Instructions: Always refer to the manufacturer's guidelines for the specific CT contrast tubing you are using. Different brands may have slightly different procedures.
- Maintain Sterility: Throughout the replacement process, maintain strict aseptic technique to prevent infections.
- Check for Leaks: After connecting the new tubing, check for any signs of leakage at the connection points. If you notice any leaks, disconnect and reconnect the tubing carefully.
Why Choose Our CT Contrast Tubing
As a trusted supplier, we offer high-quality CT Contrast Tubing that meets the highest industry standards. Our tubing is designed for easy use and reliable performance, ensuring a smooth and safe contrast injection process. We also provide a variety of options, including IV Extension Tube and IV Coiled Extension Tube, to meet the diverse needs of healthcare facilities.
Contact Us for Procurement
If you are interested in purchasing our CT contrast tubing or have any questions about the replacement process, we encourage you to contact us. Our team of experts is ready to assist you with your procurement needs and provide you with the best solutions for your medical facility.
References
- Medical Device Manufacturer's Manuals
- Best Practices in Infusion Therapy Guidelines