


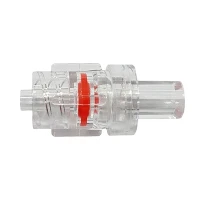


Hey there! As a supplier of luer lock connectors, I often get asked about how to disassemble these little but crucial medical components. Today, I'm gonna walk you through the process step by step.
Understanding the Luer Lock Connector
First off, let's quickly go over what a luer lock connector is. It's a type of fitting that's widely used in the medical field, mainly for connecting syringes, needles, and other fluid transfer devices. There are two main types: the Male Luer Lock Connector and the Female Luer Lock Connector. The male connector has external threads, while the female one has internal threads. When you twist them together, they form a secure, leak - proof connection. There are also Rotating Luer Connectors, which offer more flexibility in terms of movement.
Why You Might Need to Disassemble a Luer Lock Connector
There are a few reasons why you'd want to take a luer lock connector apart. Maybe you need to clean it, or perhaps you're replacing a worn - out part. In some cases, you might just be doing some maintenance on a device that uses these connectors.
Tools You'll Need
The good news is, you don't need a bunch of fancy tools to disassemble a luer lock connector. All you really need is a pair of clean, dry hands. In some cases, if the connector is really stuck, you might need a pair of small pliers, but use them with caution so you don't damage the connector.
Step - by - Step Disassembly Process
Step 1: Prepare the Work Area
Before you start, make sure your work area is clean and well - lit. You don't want any dirt or debris getting into the connector when you take it apart. Wash your hands thoroughly with soap and water, and dry them completely.
Step 2: Identify the Connector Type
As I mentioned earlier, there are male and female luer lock connectors. You need to know which type you're dealing with because the disassembly process is basically the same but with the roles reversed. If it's a male - female connection, the male part goes into the female part and then twists to lock.
Step 3: Loosen the Connection
Hold the two parts of the luer lock connector firmly. If it's a standard luer lock connection, you'll want to turn the male part counter - clockwise relative to the female part. It should start to loosen up as you turn. If it's really tight, you can use your thumb and forefinger to get a better grip.
If you're using pliers, make sure they're clean and don't have any sharp edges that could scratch or damage the connector. Gently grip the male or female part (depending on which is easier to hold) with the pliers and turn counter - clockwise. But again, be careful not to apply too much force.
Step 4: Separate the Parts
Once the connection is loose enough, you should be able to pull the two parts of the luer lock connector apart. Sometimes, there might be a little bit of resistance, especially if there's some fluid or debris inside. In that case, you can try wiggling the parts gently as you pull to break the seal.
Step 5: Inspect the Parts
After you've disassembled the luer lock connector, take a close look at the parts. Check for any signs of damage, like cracks, chips, or worn - out threads. If you notice any issues, it might be time to replace the connector.
Special Considerations for Rotating Luer Connectors
Rotating luer connectors are a bit different because they have an additional rotating feature. When disassembling them, you still follow the basic steps of loosening the connection by turning counter - clockwise. But be aware that the rotating part might have some internal components that need to be handled carefully.
If you're having trouble disassembling a rotating luer connector, it might be a good idea to refer to the manufacturer's instructions. Some rotating luer connectors have specific disassembly procedures to avoid damaging the internal mechanism.
Cleaning and Reassembly
Once you've disassembled the luer lock connector, it's a good time to clean the parts. You can use a mild soap and water solution to clean the connectors, and then rinse them thoroughly. Make sure to dry them completely before reassembly.
To reassemble the connector, simply reverse the disassembly process. Align the male and female parts, and then turn the male part clockwise relative to the female part until it's securely locked in place.
Safety Precautions
When working with luer lock connectors, especially in a medical setting, safety is super important. Always make sure the connectors are clean and free of any contaminants. If the connector has been used with any hazardous substances, follow the proper disposal and cleaning procedures.
Also, be careful not to over - tighten or under - tighten the connector during reassembly. Over - tightening can damage the threads, while under - tightening can lead to leaks.
Conclusion
Disassembling a luer lock connector isn't rocket science. With a little bit of know - how and the right approach, you can easily take it apart, clean it, and put it back together. Whether you're a medical professional, a technician, or just someone who wants to learn more about these components, I hope this guide has been helpful.
If you're in the market for high - quality luer lock connectors, we're here to help. We offer a wide range of Male Luer Lock Connector, Female Luer Lock Connector, and Rotating Luer Connectors. If you have any questions or are interested in placing an order, feel free to reach out. We're always happy to discuss your needs and provide the best solutions for your projects.


References
- General knowledge of luer lock connectors in the medical industry
- Manufacturer's guidelines for luer lock connectors